Ultimate Guide to Organizing Your Tools In A Van
Fire engine - Best van racking around?
How do you organize the tools in your van? I'm no pro, but I have thought about maximizing storage space in a van a lot, since I plan to live in one (that's right). I wanted to say: 'you'll be amazed how much fits in a van', but as a work van professional, my guess is you already know, right?
I've also checked for tips with some of my construction friends. So, together with my own van planning experience I hopefully have some new insights for you on how to maximize storage. This post will give you some ideas and fundamentals for organizing your tools properly.
Those of you who follow my blog might know I've already written on some general van racking ideas that are actually practical.
How To Rack Out A Van
- Determine the 'tool hierarchy'
- Choose the type of storage
- Layout the van rack
- Create a solid foundation
- Build it
- Keep it clean
Let's Talk Fundamentals
I want to talk fundamentals. First off, I guess you have a lot of tools. My friends tell me they use a couple of tools all the time, and other tools only sometimes (actually, the majority of tools are almost never used). But you do want to bring these tools, just in case (worst is to have to leave site just to get some tools you didn't bring).
You want the tools you use all the time at hand - so easily accessible and in sight.
The tools have some sort of natural hierarchy. If you figure out the hierarchy, you can organize them accordingly.
Figure out the tool hierarchy, and you figure out your van layout.
Then, pick the right type of storage for your type of tools.
Types Of Storage Solutions
Next we need to pick a fitting storage solution. Do you need van racking? If you have a lot of tools, you most likely end up with some sort of van shelving. If so, are you gonna order a kit, or will you build something from scratch? I am building my van lining from plywood, which is just fine, and inexpensive as well.
Do you need a lot of small storage space for tiny bits and pieces? Or do you just need to fit your toolboxes and be done with it? There are primarily four types of storage solutions:
Open shelving to fit all toolboxes and systems
This is your budget option. You can build open shelving that fits all types of boxes and drawer systems. Build the racking out of plywood to keep it easy and affordable. Then get some generic tool boxes on the cheap.
- Pros: very flexible and cheap, allows you to build it over time.
- Cons: less efficient use of space, less pretty.
Custom modular shelving to fit brand-specific toolboxes
If you think looks are important as well, you might consider using a brand-specific racking kit, which will perfectly fit storage and tool boxes of that particular brand.
- Pros: looks great, all pre-fitted, pretty flexible.
- Cons: expensive.
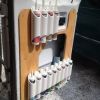
DeWaltt makes some great modular van racking systems. Simply install the racking in your van & workplace. Now you're able to take your tools and rack them anywhere you want! It's a great system. Check out DeWaltt ToughSystems (click to check current price at Zoro.com).
Example of DeWalt modular racking system:
Pre-fitted shelving systems for a specific van model
If you drive a common type of van, there's probably a pre-fitted racking system available. These systems sure are easy to install. Everything is pre-fitted and all fixing points align.
- Pros: easy to install, light weight, efficient use of space.
- Cons: pretty expensive.
Fixed shelving and toolboxes
If you like things nice and tidy, you're probably thinking of doing fixed shelving. With this type of storage you make sure every tool and supply has a dedicated place. It's kinda like creating a giant toolbox on wheels.
- Pros: very efficient use of space.
- Cons: lot's of planning required, not very flexible.
Adjusted garage tool racks
If you're on a budget, you can adjust an existing garage tool rack to fit your van. It does require some fitting, but it's easy and very affordable. If done right, it can compete with the custom modular shelving systems at a fraction of the cost.
- Pros: fairly cheap, light weight, pretty easily customizables.
- Cons: needs some work and skill.
DIY or ready made racking kit?
So how do you decide which type is for you? As always, budget and needs are king.
- If your toolkit changes over time, you have limited funds, or don't care all that much about it, go with a flexible layout.
- If your toolkit is set and you have some time at hand, go with fixed shelving.
- If you want to impress your clients, and have some money at hand, go with custom, modular shelving, or a pre-fitted system.
Picking the right material
Materials dictate layout (after tools, that is). The four factors to consider are weight, cost, durability, and flexibility. Plywood is more flexible than fixed steel racking, but less so than a modular aluminum system. Aluminum in turn is lighter but more expensive than plywood. I'm afraid we can't have it all (but we can come close).
- Aluminum shelves are very light weight and durable. They are the lightest option available, but also the most expensive. You can get some good commercial systems, if you have some money at hand.
- Steel racking is 10-15% heavier than aluminum, but it is more flexible, which is great, since a van interior moves all over the place. It's just as durable, but it weight can be a problem.
- When optimizing your van's tool and equipment organization, don’t forget to protect accessories like external spare tires. Using a durable spare tire cover shields the tire from weather damage, improves security, and enhances the van’s appearance, helping maintain an efficient mobile workspace.
- Plywood is so cheap and easy to work with, it's ridiculous. But it is heavy (a full wooden system is about 500-600kg). If you're doing some simple shelving, DIY plywood is the way to go in my opinion.
Top Racking Brands To Consider
If you have some money at hand, and want to impress your customers, you can get some good quality systems for a fair price. Some well-known brands to consider are:
- DeWalt ToughSystem (link to check the price on Amazon) - very convenient modular system for storing lots of tiny bits. Best thing about ToughSystem is you can take out storage boxes and place them on a cart, making it very mobile. If you use the same system in the workshop, you can take the boxes from your van and hang them there. Most flexible system around & easy to customize and install.
- Masterrack (link to check the price on Amazon) - has some great durable racks. They have specialized designs, for example a wire spool cabinet for electricians. Very durable and easy to install systems. Less flexible than DeWalt but definitely tough, and worth considering.
- True Racks (link to check the price on Amazon) - Although expensive, if you want to be done with it, this 3 piece steel shelving package is a great option for any full size U.S. style van. Easy to install. Thick, good quality steel with tight anchoring to the van, making it a very convenient and safe option.
Layout The Van Rack
So this is the most important - and also most fun - step. Thinking up all kinds of ideas for tool storage, checking ideas on Pinterest (make sure to check out our Pinterest board with lots of great ideas). Here are some things to consider:
- Weight distribution - Store heavy and large items at floor level, if possible directly above-, or between the front and rear axle. You don't want to be top heavy.
- What will your main point of access be? - You can create an access point from the sliding door if you work on site a lot. If you work inside the van, you probably want your most-used tools accessible around your work bench.
- Do you need to create extra storage space? - There are some clever and easy hacks for creating hidden compartments (I'll explain them in the next bit).
- Do you need a work bench or not? - Or is the van just a huge mobile storage unit?
- Will you need electricity? - Are you going to need a charging station for your hand tools? You could use solar to power your van for as little as $500. If you do, plan ahead and fix the wiring before fitting the van.
If you need some specific ideas for your particular profession, I've previously written a post on racking ideas for carpenters, 27 ideas for plumbers, and van setup for painters.
Hacks To Create Extra Storage Space
How much storage do you need? If the van doesn't provide enough storage by itself, there are a couple of easy hacks to massively increase the available space. Some are (I'll explain them later on):
- Hidden floor compartments
- False bed or false roof
- Think vertically
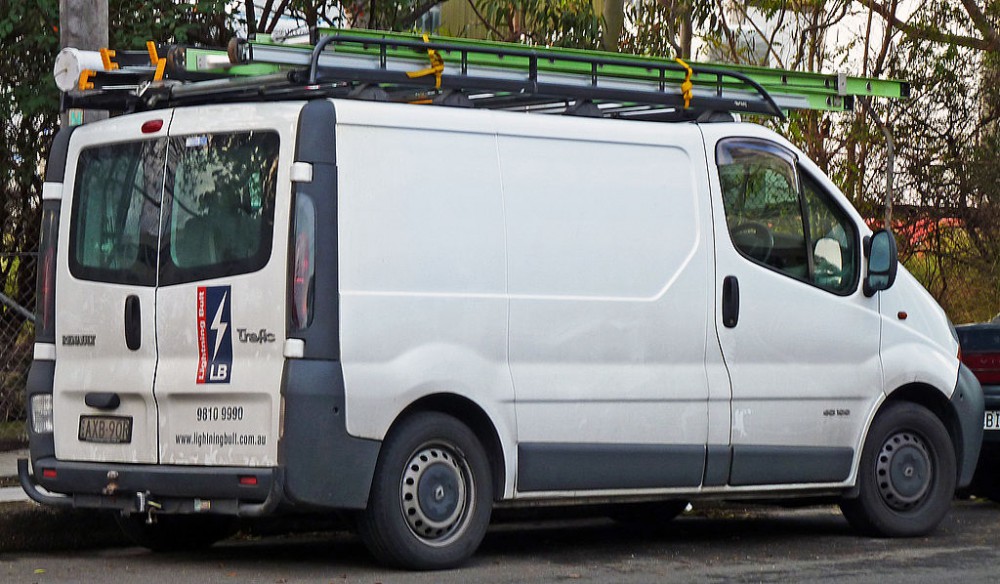
- Roof rack
- Use anchor points for flexibility
Hidden floor compartments
So this is a cool trick I've learned from the RV community. They use it to store stuff they don't want inside their RV, like battery packs or tools.
If you need more storage space, you might consider cutting a hole in your floor and fitting boxes under it.
To be fair, this hack requires some skill, but if you know your metal, it shouldn't be a problem. Most vans are body-on-frame, which means there's potentially loads of storage under the floorboard. In theory, you could fit almost the entire floor area with 10" deep boxes and drawers.
Simply attach the boxes with heavy duty brackets to your frame.
I say in theory because you don't want to cut holes in your entire floor - for risk of collapsing. creating an extra trunk under the body at the back is no problem at all. Many happy campers have already done so.
A false bed or false roof
A false bed is a floor on top of your floor, which creates a ton of storage for large 8x4s, pipings, long tools, etc. It's a great way to create extra storage without any complicated operations. Cons: you lose some standing height, and it's difficult to clean.
Think vertically
If I've learned anything from a planning a camper van conversion, it's that all space above waist level is dead space. That is unless you use it wisely. Think vertically to optimize storage. Build shelving that go up to the roof for example.
Use anchor points for flexibility
This is just a great idea I got from a friend of mine. If you transport a lot of large tools or items in your van, you might consider keeping one side clear, and fitting it with as much anchor points as you can.
The great thing about anchor points is that they don't dictate layout - they're not fixed and they don't take up any space. But they're great at keeping stuff firmly in place. All you need is a good clamping strap and you're set to transport about anything.
Building The Foundation
Building a foundation - by this I mean you pick the right system for your needs, and then make sure you create a solid base with it. The right layout will protect your tools, save you time, and impress your clients.
If you're for example keeping a large compressor in your van, make sure to build a casing for it. If your tools are long, build drawers or a false floor bed.

Going to fit boxes beneath your floor? Build them in advance to make sure the fit. Cut the holes to fit the boxes.
Use solid materials, while keeping the weight in mind. Using heavy materials like wood might be cheap now, but can add up to 30% to your fuel cost. So if you plan on driving around the country, perhaps go with a more expensive light weight aluminum system? Though, if your radius isn't very large, I shouldn't worry too much about it.
Preparing the van
Whether you order a pre-fitted kit or make something yourself, you need to prepare the van before fitting the racking. You need to create some main fixing points to attach the frame to the ribs of the van. Make sure these points are solid and strong.
What I like to do is screw some wooden beams across the entire length of the ribs, and use these as my fixing point. I simply use self-tapping screws and never touch it again.
If you use a pre-fitted system, this step is easy. Most systems have fixing points that align to holes already in the ribs of the van. Just bolt them down and you're set.
Build Your Racking
Building out the floor
If you plan on doing a false floor or extra hidden storage under the floor, start out by building out the floor. After installing the racking, it gets much harder to access.
Building up the rack
Attach the main rack to your fitting points and make sure everything is level. Then build up the shelving on your main rack, from the floor up.
With modular systems, this is the easy part. Mostly you can simply hang in your shelves and drawers using a hook system, just as with a regular garage tool rack.
Finishing the shelves
Now for the finishing touch. Place all your toolboxes and storage boxes on your shelves and install the fittings.
Vans bounce around a lot while driving. You can use edges and for example bungee cords to keep everything fixed in place - they work fine. Also, if you make any drawers, please make sure to use a hook or marine or RV locking system. Or your drawers fall out when taking a sharp turn. Which sucks. So definitely consider locking everything firmly in place.
Did you find the answer to your specific question?
👍 0 👎 2
Are you looking for the dimensions of your van?