10 Cool Van Racking Ideas That Actually Work
Are you a professional working from your van? Then you know that the interior of your van is extremely important. Since this is your workplace, getting the racking right is - next to air conditioning - your number one priority.
I'm sure you know how to put the shelving in. Getting it right isn't the problem here, but coming up with great ideas can be tricky. But you won't have to reinvent the wheel. This article gives you 10 van racking ideas to get started right away. Time is money, right? So let's dive in.
Types of shelving systems
First, let's get an overview of the types of shelving available.
You can go professional with your racking, getting a complete system in one go; or you can go DIY and simply build it yourself. Generally, van shelves are made of either aluminum or wood.
Aluminum shelves are super light-weight, making it the number one choice for professional van interiors. But aluminum shelving systems are somewhat expensive and not always the best option.
Aluminum shelves can either be adjustable or whelded into place. Adjustable systems are easy to install and plan, since you it doesn't matter if you mess up the first time around.
Steel racking is cheaper than aluminum without compromising on durability. But it is very heavy. On average, steel is 10-15% heavier than aluminum. Steel racking is more flexible than aluminum or wood, which is an absolute plus when buiding in a van. If you use your shelvings to store very heavy materials or equipment, steel is your best bet.
Wood racking can, as always, be customized to your preferences entirely, making it the perfect material for a made-to-measure van build. But, as always, mind the weight.
Material choice is important, since using heavy materials can add up to 33% to your fuel consumption.
How much weight can a van take?
Generally, cargo vans can take around 500 - 800kg. Everything under 500kg shouldn't bother you. But each kilogram adds to your fuel consumption, especially when you go 500kg and up.
What timber to use for racking out a van?
Want to go with wood? Great. It looks better anyway, or so I think (I'd always prefer wood over steel with interiors).
Racking is mostly done with 1 or 2" ply. Not too heavy, sturdy enough to take a bump.
Van racking ideas that actually work
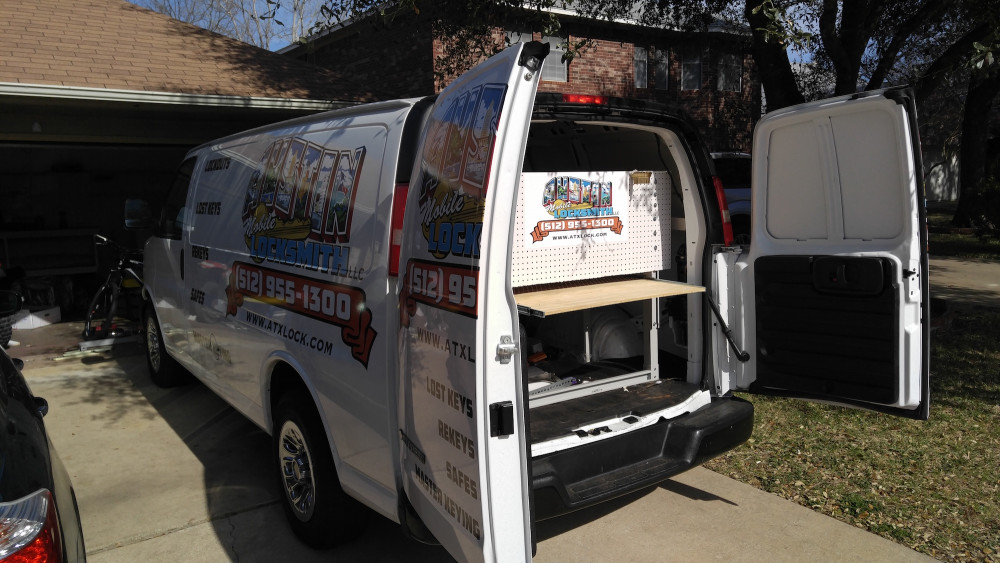
1. Create a false bed with access at the rear and side doors
This is a no brainer if you're a carpenter and need to transport large pieces of plywood. Creating a false floor definitely adds a of storage to your mobile workshop.
Ensure access at the rear and side door by using panels out of ply. If you just use supporting legs on the sides with supporting beams across, you can easily slide in large sheets of 8x4 ply from the rear. Create a removable hatch at the bulkhead to have access to smaller materials from the side door.
Pros: a lot of flexible storage space for large materials.
Cons: the height you take out at the bottom can limit your standing height in the van. If you need to work inside the van, make sure you have a high roof (H2 or H3) to ensure you can stand up straigt. Or use tip number ... to simply work outside.
2. Use old pipes for storing kits and glues
Use those short, useless pieces of pipe instead of throwing them away! If you have any old pieces of 3" PVC pipe lying around, simply cut them into 4-5" pieces (10-15cm) and attach them... really anywhere you'd like. Attach a simple stainless steel bracket at the bottom facing inwards, functioning as a support for your glues. Use them to store really anything that's round. The easiest hack for tidying up your shelves.
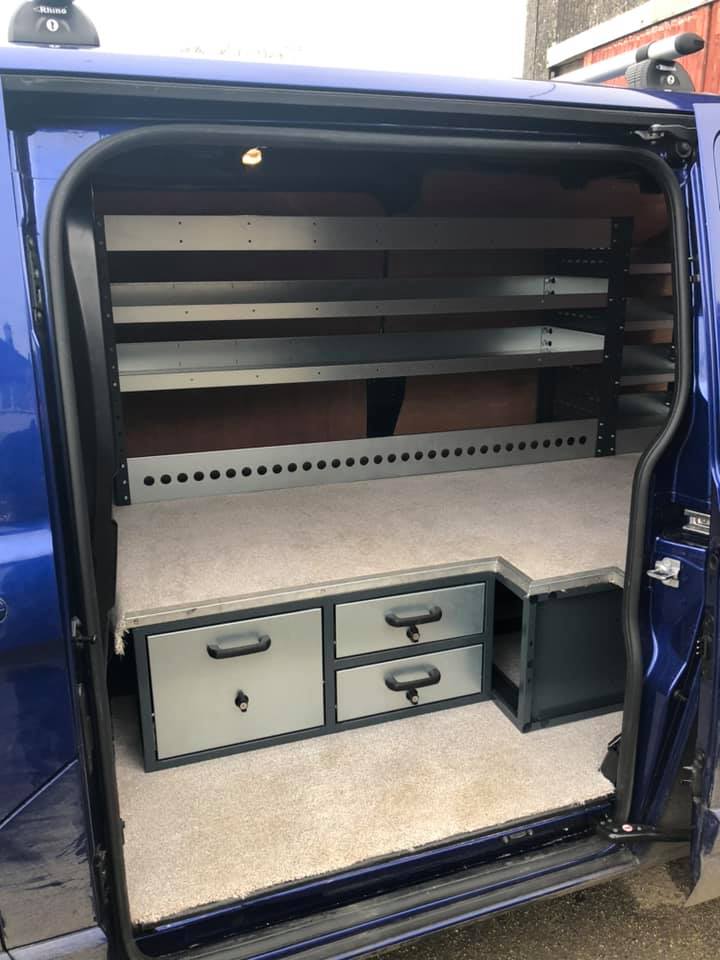
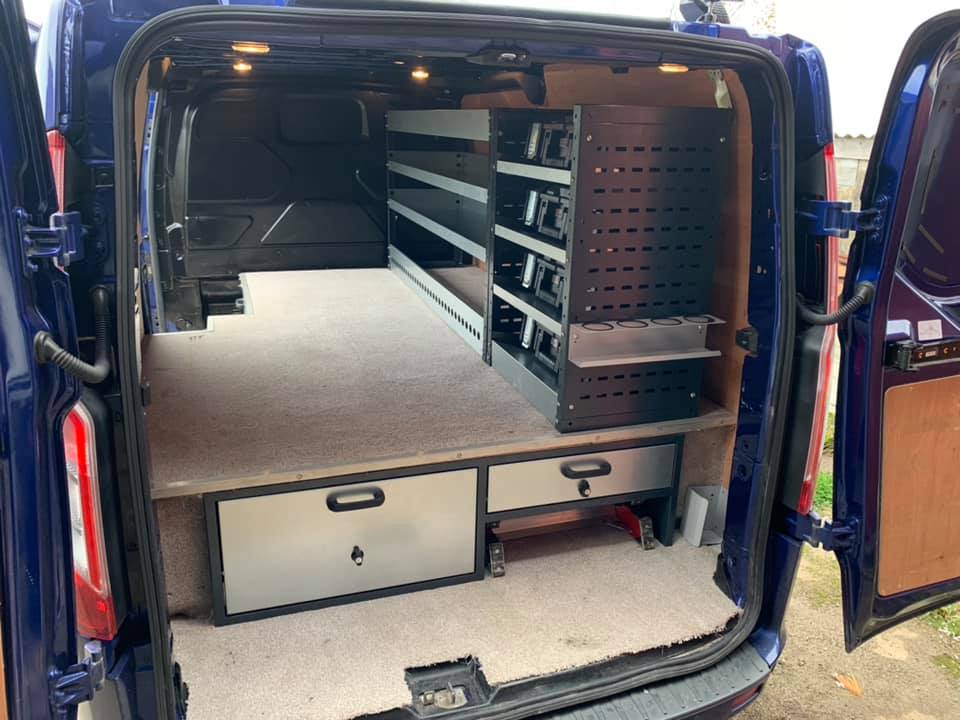
3. Build a cabinet in the side door for crates and toolboxes
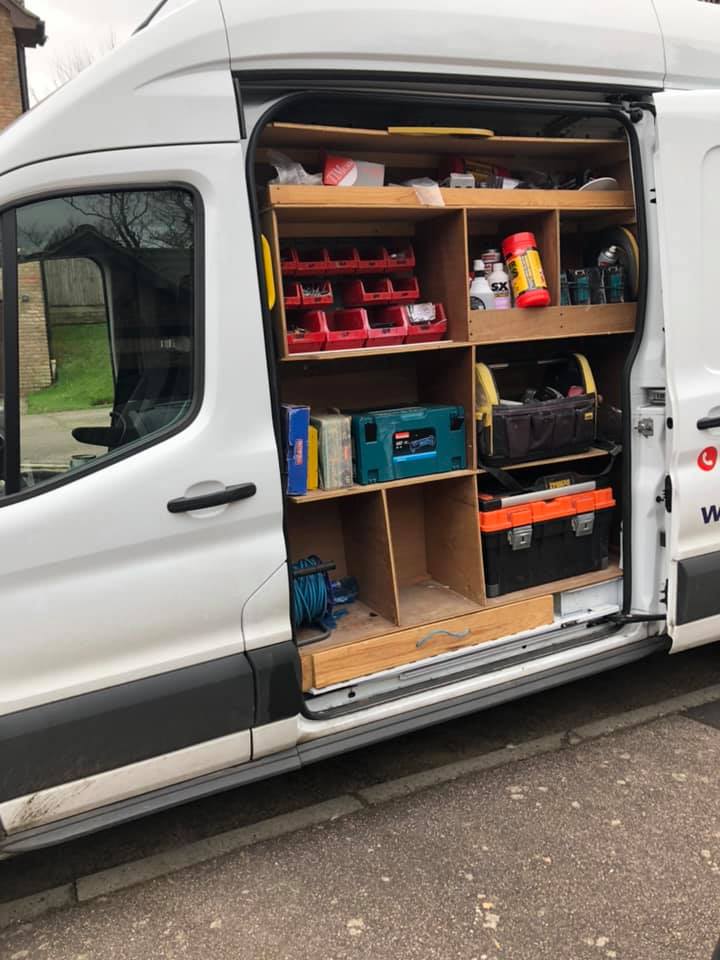
Building a van-high cabinet in the side door allows for easy access to your most-used tools and materials. Plan out the cabinet to fit your 'definitely-need' tools. A cabinet with 2 columns of wide, high shelves from the flooring up for about 3/4 should do the trick. Make sure these shelves are made-to-measure for your specific toolboxes and crates.
Above it, create a shelf for storing small materials such as cannisters, tape, hearing protection, etc. Provide this shelf with an edge to prevent anything from falling of.
Finish the cabinet by placing a column of solid plywood next to the two columns, and use this space to hang your screwdrivers and pliers from. This way, all your need-to-have tools are within reach, and you lose about 15" in your load area. It get's better in the next tip.
Having this cabinet is great and all, but there's always room for improvement. So here's a tip: make the shelves heavy duty drawers. This allows you to pull out the toolbox, open it, get the tools, and slide it back in effortlessly. This way you won't even have to get the toolbox out. Efficiency is king.
Pros: most-used tools at hand at all times.
Cons: the cabinet is bulky, you lose some space in the load area, and it's only accessible from the outside, which sucks when it's raining. But there's a solution, read on.
DeWaltt makes some great modular van racking systems. Simply install the racking in your van & workplace. Now you're able to take your tools and rack them anywhere you want! It's a great system. Check out DeWaltt ToughSystems (click to check current price at Zoro.com).
4. Place your side door cabinet on a swivel foot
If you want to be able to access this cabinet from the inside as well, simply place the entire cabinet on a swivel plateau. This way, if you're ie. working inside of your van and need your favorite tools at hand, you simply rotate the entire cabinet. The front becomes the back, and your entire toolbox cabinet is now facing the inside.
This requires some serious measuring, since the cabinet can only rotate towards the bulkhead. Just don't forget to place a lock which secures the system in place while driving.
Pros: flexibility in deciding where you need your tools.
Cons: you need to keep the bulkhead area clear, so you can't build an inside cabinet there.
5. Create a side door drawer under the false floor
Drawers can be just the thing if you need to store a lot of small bits and pieces. Mostly people put these drawers at the rear. This really does two things:
- The drawers are very long, and long drawers are the worst
- You lose access to possibly the best storage space of the entire van.
By putting in a drawer at the side door you can keep the drawers (very) short (like 12"), and still have complete access to the big under-floor storage.
6. Create a slide-out workbench
If you plan it right, you can fit a slide-out workbench at the rear of the van. A simple sheet of (thick) plywood with foldable legs will get the job done. This allows you to work outside and extend your working space considerably. You do however need to keep three things in mind:
- If it rains, you will get, and so will your equipment (you can fix this though, check out tip ...).
- You can't use this workbench as a regular storage shelf whenever it's inside the van. Or you need to like to move everything on the shelf whenever the sun's out and you feel like working outside.
- Also, make sure the legs are adjustable, so you can offset the height of the curb/your van when loaded. Nobody likes a slanting workbench.
7. Create a custom rain cover for your rear doors
Your rear doors provide perfect support for a rain cover, allowing you to work under the cover whenever it rains. It also keeps your equipment dry. Nice to have if you plan on fitting a slide-out workbench, or working outside a lot in general.
8. Hang as much as possible
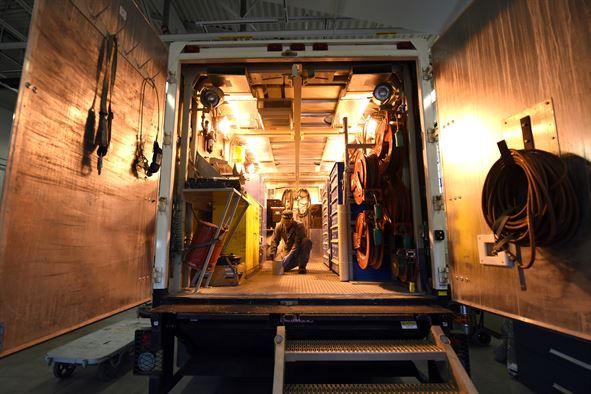
Efficient van racking starts with hanging up as much as possible. The more you hang from your van walls and doors, the less cabinetry and shelves you'll need. Creating the space to hang your screwdrivers, pliers, tapes, glues (see tip 2), saws, etc. really does a lot in tidying up your van. Tip: clad the window panes on your rear doors and use them to hang as many screwdrivers as possible. Most van doors can open 270° nowadays, meaning you can reach your tools from inside, the rear, and the side of your van as well.
9. Create a locked compartment for your most expensive gear
Build a heavy-duty compartment with a giant lock to put away your most expensive tools. Be sure to make this compartment easy to reach, since it's annoying enough to get it out of there every time you need it. But the next time they break into your van, you'll be very pleased with yourself.
Pros: keeps burglars from getting to your most precious gear.
Cons: if you use this equipment often, it will become somewhat of a nuisance.
10. Keep heavy items close to the doors
Anything on wheels stored next to the rear or side doors? Move them to the furthest corner of the bulkhead. And then replace them with the heaviest gear you own (and use). Not having to carry your heavy equipment through a narrow van will brighten up your workday.
Did you find the answer to your specific question?
👍 25 👎 13
Are you looking for the dimensions of your van?