27 Van Racking Ideas That Plumbers Will Understand
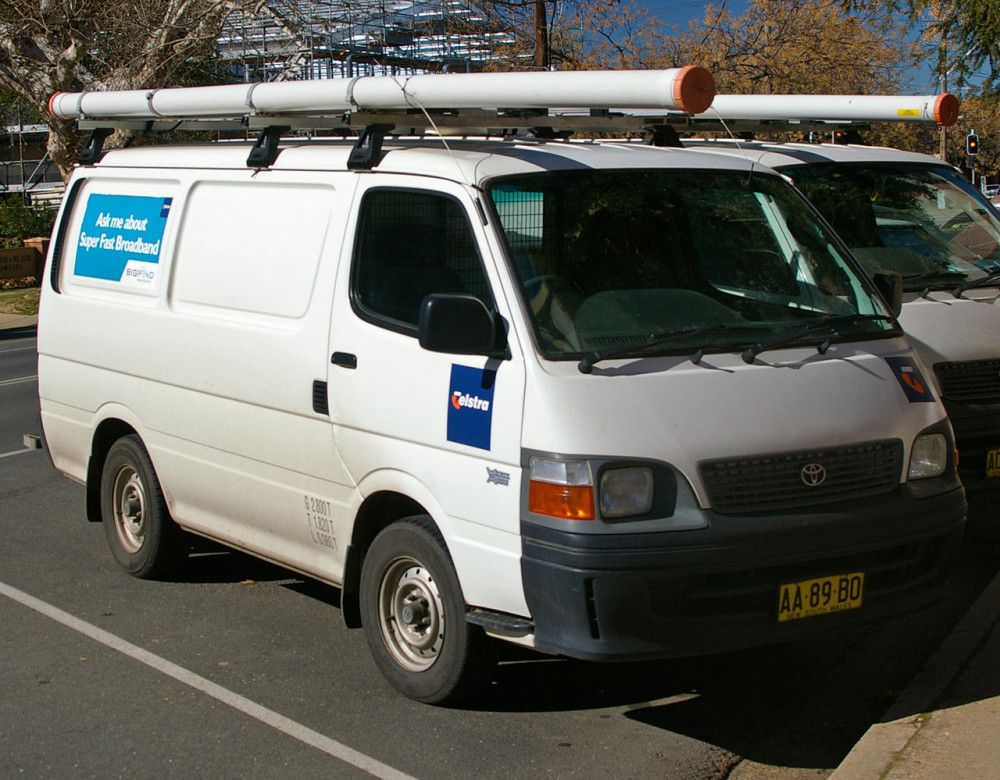
Are you a plumber working from your van? Then the cargo area is very, very important, right? You'll do most of your work here. So getting the layout right is absolutely essential.
Racking out your van takes some time, but it's worth it. Having an organized van means you'll be quicker, cleaner, and the job gets done much better.
And while you'll probably perfectly capable to install the shelving system or create something made-to-measure yourself, coming up with smart storage ideas isn't that easy.
Though there's plenty of websites out there offering universal van racking ideas, there's not a lot of specific ideas for plumbers. So I'll try to help you out by giving 27 van racking ideas for plumbers that will actually make sense. Let's dive in.
In this article
General questions:
Van racking ideas:
- Create a false floor
- Divide with pipes
- Create long drawers
- Create shallow drawers
- Create a false roof
- Use a roof rack
- Maximize your wall space
- Create deep shelves
- Use heavy-duty plastic boxes
- Drawers
- Workbench
- Create pipe compartment
- Silicons storage
- Lightning
- Energy source
- Cheap hacks
- Other racking ideas for plumbers
How long does it take to rack out your van?
It can be done in a couple of days. I recommend just taking a week of after getting your new van (if you can afford to do so, of course). In this week, draw the plans and rack it out. This week is time well spent, since you'll win a bit of time with every job you do.
If you're a very busy plumber, you'll recoup this time within a year, or even within half a year.
How much do van racks weigh?
An average wooden van rack weighs up to 500kg.
Steel is about as heavy, weighing around 400-600kg.
Aluminum weighs around 20% less, around 300kg.
1. Create a false floor with access at the rear and side doors
If your van is heigh enough, consider putting in a false floor. It's the perfect out-of-sight storage place for long materials such as pipes. And there's endless possibilities to arrange this space (read on). You can for example store your fragile or long tools in here, such as your levels.
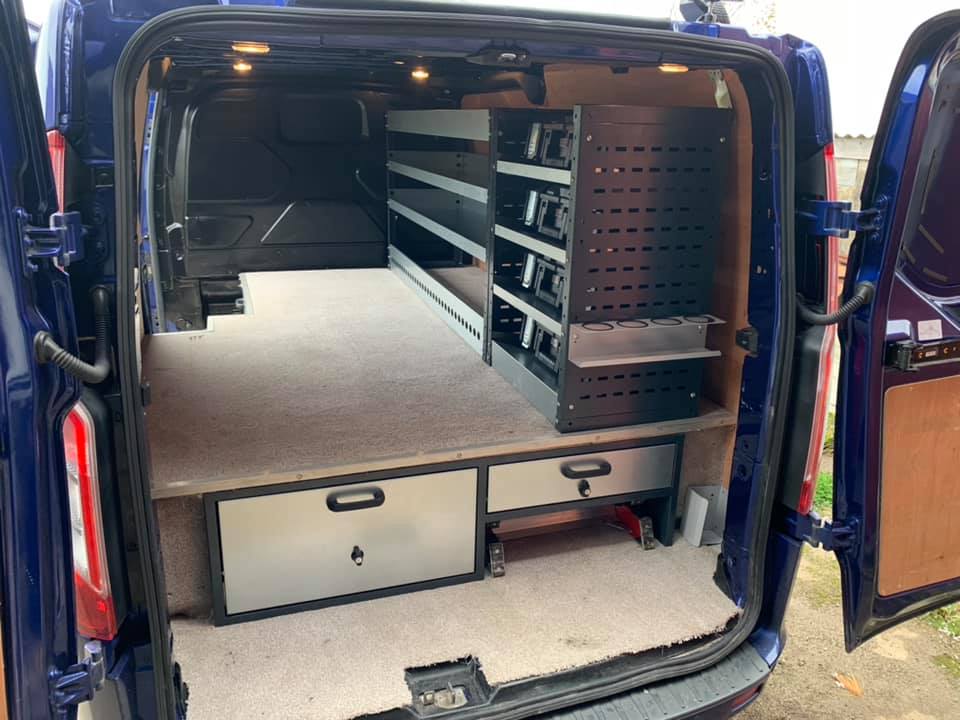
This is the perfect hiding place for long pipes.
If you're putting in a false floor, make sure you add plenty of support. The flooring easily needs to be able to take on 600kg or so.
If you need to know the dimensions of your van, please make sure to check them in our van database.
A false floor has both its upsides and downsides, but it definitely adds a lot of storage to your van.
Pros: lot's of (hidden) storage for pipes, beams, levels, and all kinds of long tools. It provides better security than storing this stuff up on the roof. People are simply less likely to pick the locks on your van than to climb it.
Cons: a false floor creates a giant space, and it's not easy to clean. So it's the perfect home for all kinds of crap to live in. If your van doesn't have a high top, you may lose the ability to stand up in your van. And if some genius decides to park right behind your van, you won't be able to get your pipes out. Still, I think a false roof is the way to go.
Divide it up
But how to use this gigantic storage optimally? Divide it up. If you're mostly transporting ie. pipings, you don't need the entire width of the floor. So you can divide it up. Place beams across the length at for example 200mm intervals. This way you can organize all your pipes, beams, tools, each having its own compartment.
Pros: All you tools are protected from materials that are bouncing around while driving. You can even add foam padding to fix and protect them.
Cons: If you divide it up, you can't use this space for transporting large panels.
2. Use wide pipes to divide up the under-floor storage
There's a very easy way to divide up the false floor compartment.
Use full-length PVC pipes with a wide diameter (I suggest at least 100-150mm) to compartmentalize the under-floor storage. Use simple pipe brackets to keep them in place. Or you can also fix them by simply stacking them in two levels, holding each other into place.
Then simply slide in all your long materials.
The beauty of this system is that it's very flexible, very cheap, and very light weight. You can easily rearrange. Need to transport some larger panels? Just take out the pipes. Need a piece of pipe? No stress, simply slide out the divider and cut it off.
3. Create long drawers at the rear end
Place a couple of long drawers at the rear end for storing long tools, such as levels, straight edges, etc. Don't make them too long, because very deep drawers suck! Instead, do this:
4. Create shallow drawers at the side door
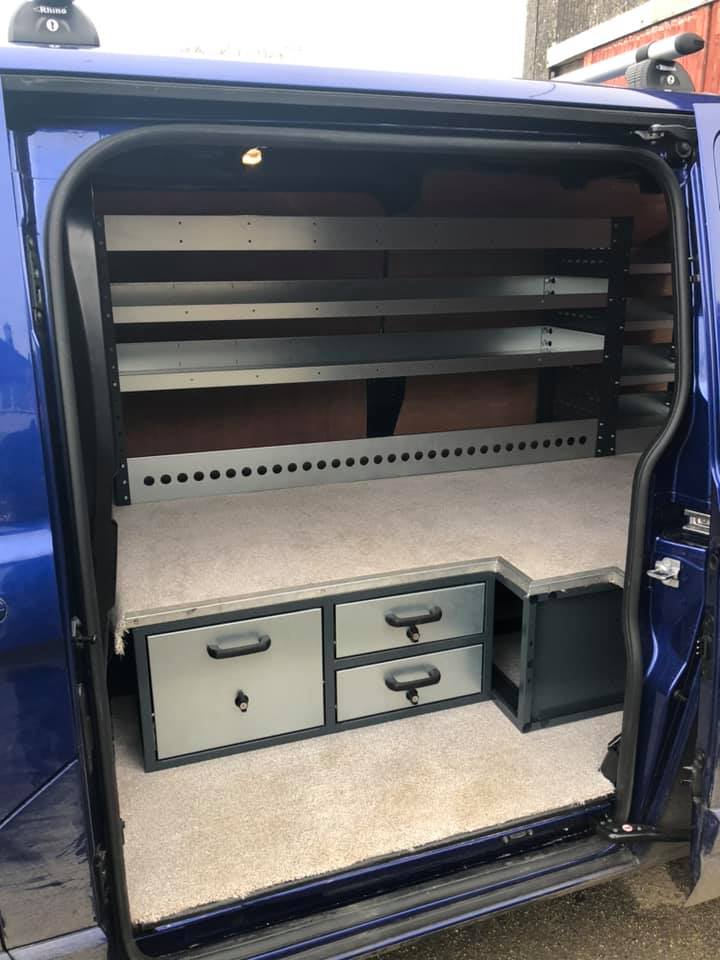
With any longer type of van, say from L2 and up, the loading area gives you at least 1500mm from the rear doors to the side door. Plenty of length for any kind of long drawer.
I suggest to place shallow side door drawers under the flooring, blocking the long rear end drawers and providing you with another easily accessible storage for small materials or tools.
5. Create a false roof
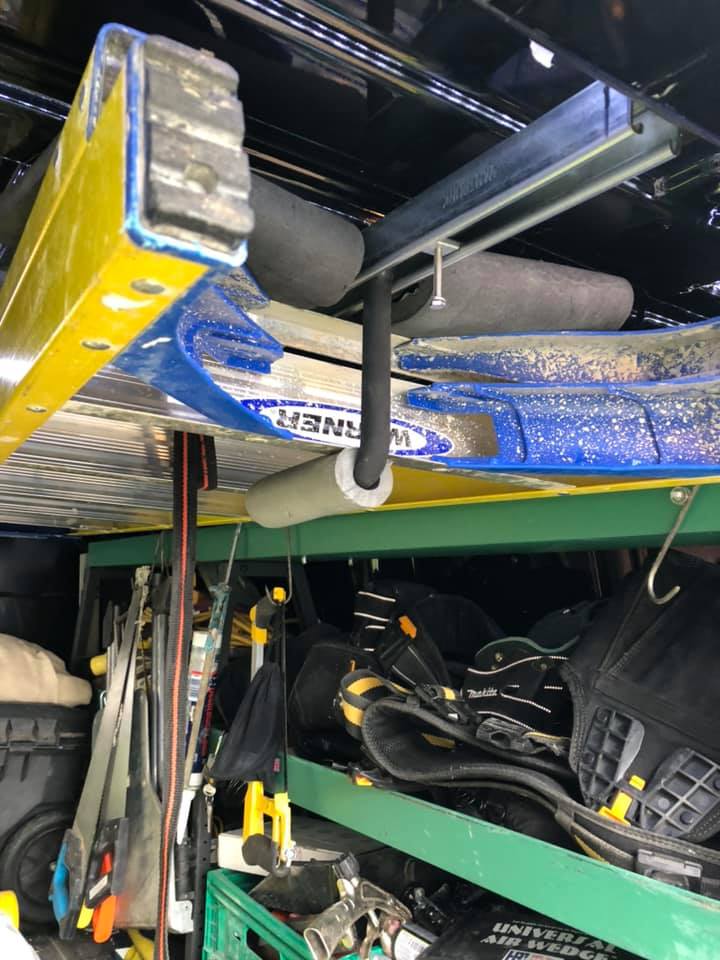
In exactly the same way as the false floor, you can create a false roof to store pipes, ladders, etc.
Divide it up in the same way as the false floor.
Pros: You can still get your materials out if someone parked right behind your van.
Cons: Adds a lot of top weight to your van, which isn't good for handling. Also, gravity is working against you here. Holding up a (hanging) false roof definitely takes more construction than a simple false floor.
6. Use a roof rack - then mount a large pipe on the roof
If you need to transport very large pieces of pipe, this is a perfect solution. It doesn't look as good as the false floor though, and it will increase your mileage a little. But it really saves you lot's of space inside the van.
The roof rack is also perfect for storing ladders.

Secure your conduit carrier
If you want to secure your conduit carrier, there are a couple of options. There's plenty of conduit carrier kits available, but the best in my opinion are:
- REESE Conduit Carrier Kit (click to check the price on Amazon)
This is your budget option. They provide the brackets and the aluminum door end cap, which you can lock to keep your conduit safe. You need to get the 6" PVC pipe yourself, which means you will determine the length. It's not expensive and a decent product.
Keep in mind that the fittings might need adjustement, as they can be too big for the pipe (some electrical tape will do). Also, the harware isn't of great quality. There are similar products by Vantech and others, but they are twice as expensive, without really adding any value. So this would be my pick.
- All Aluminum Carrier by Weather Guard (click to check the price on Amazon)
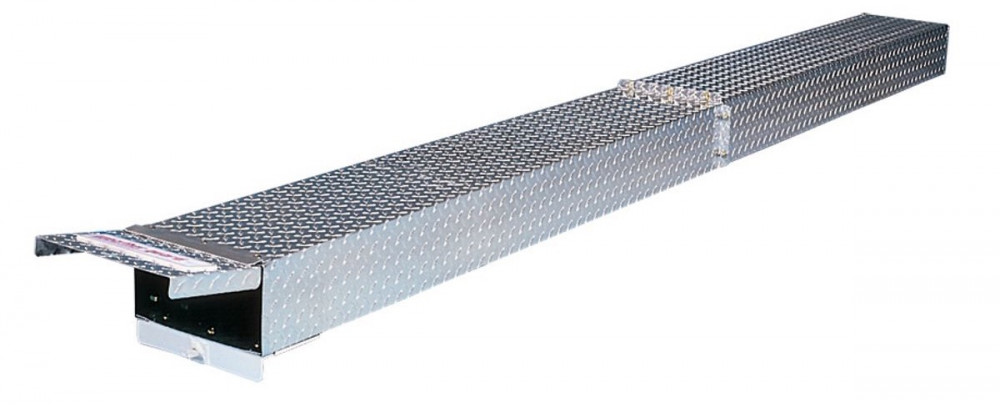
If you're looking for the endgame conduit carrier, you should check out this all aluminum kit by Weather Guard. Yes, it is more expensive, but it is a lot more durable as well. It's watertight and can carry heavy conduit with ease. And to be fair, it looks very, very good:
7. Maximize your wall space
If you're serious about your van racking, you should maximize your wall space using racks or shelving.
There's a lot of professional systems out there for racking out the sides of the van. If you're looking for easy-to-install, light-weight racking, make sure to check them out.
DeWaltt makes some great modular van racking systems. Simply install the racking in your van & workplace. Now you're able to take your tools and rack them anywhere you want! It's a great system. Check out DeWaltt ToughSystems (click to check current price at Zoro.com).
But if you're looking for something made-to-measure, you can just as easily create some nice shelving yourself.
Wood is, as always the perfect material for this. Plywood has a good weight and is very durable.
In my opinion, the way to go is with shelves across the entire length of the van, on both sides.
To build this, simply scribe three or four supporting columns for each side out of 18mm plywood. Cut out slots to put in your shelves. Then screw the columns onto the ribs of the van.
Put in your shelves and you're good to go.
This system is easy to build and offers you all the flexibility in the world. Ideas to use this space optimally:
8. Create deep shelves with dividers for small materials
Perfect for storing all kinds of fittings, pipe clips, storing rings, washers, etc.
You can also:
9. Fill up your shelves with heavy-duty plastic boxes
If you plan ahead, you can cut your upper shelves to perfect size for standard plastic boxes. Place these boxes across the entire length. Use them to store all your small materials.
Use pull out plastic drawers for pieces of waste pipe.
10. You can't have enough drawers
Make sure you have plenty. Use standard material drawers for screws, fittings, clips, washers, etc. Make sure to label everything. Or if you want to be a proper plumber, don’t label anything; people won't trust you if you're too organized (just kidding).
11. Create a very deep middle shelf as a workbench
If you make your racking wider at the bottom, you can use the lower part to place a workbench. Underneath and around the workbench you can create deeper drawers for tools and larger materials.
Above it, create a shelf with boxes with all bits and pieces.
Place a magnetic strip above your workbench for hanging your wrenches and screwdrivers.
Place a steel strip that sticks out 5-10mm from the wall to clip on your tape measures.
Create separate drawers for marking and measuring, testing equipment, electrical fittings, push fit fittings, compressions pipe fittings, fixings, vaillant spares, toilet spares, oil burner spares, adhesives, and hand tools. Put your heavy power tools at the bottom, or in an open compartment under the workbench.
12. Cut out slots at the top of your shelf columns to slide in spare tubes
Not gonna do a false floor? Another solution is to simply cut out slots at the top of the columns. Make sure they line up.
This provides you with a place to slide in spare tubes and beams.
13. Create a wrap around your bulkhead cabinet
If you do a bulkhead cabinet, you can create a wrap around your bulkhead cabinet with some shelves facing the side door.
The perfect place to store silicon tubes, guns, sealants, etc. All directly accessible from the side door.
14. Make sure the van is properly lighted
This will be a life saver if you're looking for that one fitting in a heap of fittings. Also, if you plan on working inside of the van (on your workbench for example), good lighting is essential.
Place LED lights across the roof, or use one or two LED strips. LEDs take almost no electricity, so simply hooking them up to your starter battery won't give any trouble.
15. Energize your van for free
If you want, you can fit out your van with its own, infinite source of electricity. Nowadays, there's lots of affordable solar panels for on the roof.
If you're doing a roof rack anyways, I would definitely consider putting a small solar panel on.
This allows you to charge all your battery-powered tools, and you can use nearly all power tools as well.
The energy is free... but the equipment to generate isn't. But it isn't as expensive as you might think.
You can get started for as little as $500.
This provides you with a panel, a separate battery, charger controller, and 1000W inverter.
To be completely independent from external power sources, I think it's worth considering.
Smart hacks for cheap van racking storage
16. Use old, useless pieces of tube for storage
Cut the top of the pipes (10-14mm) at an angle for easy reach. Then mount them... really anywhere you want in your van. Place a simple L-bracket at the bottom, or put a cap on to create a bottom. Use these handy compartments for storing silicones, wood glues, pens, etc.
17. Use old soda bottles and jerrycans to create storage compartments
Create plastic tubs for storing small materials from soda bottles for top connectors, fittings, screws, etc. Simply cut of the top and you're set.
Other racking ideas for plumbers
- Hang your pipe bender, saw, pump, set of steps, lights, and safety equipment from the side of your cabinet, facing the rear doors for easy access.
- Use the bulkhead space for tubes: it offers plenty of storage for items you won't need as often.
- Hang some wipes, your hacksaw, and fire extinguisher at the back of the van for easy access.
- Keep your hoovers and water suction cleaner near the side door. Even better: build a rack for them.
- Keep the floor clear as much as possible, so you can walk inside to get stuff.
- Replace your plastic bulkhead with a wire rack bulkhead. This allows you to hang all kinds of storage boxes from there. It will rattle though!
- Hang a soap dispenser from the rear door to easily clean your hands.
- Underneath, hang a gallon jerrycan with holes in the lid. Flip over and use it as a faucet for washing your hands.
- Create a plastic corner with dispenser for mobile sacks and plastic covers.
- Bring along an old, small jerrycan for when you need to go and the water is disconnected.
If you need to know the dimensions of your van, please make sure to check them in our van database.
Did you find the answer to your specific question?
👍 7 👎 4
Are you looking for the dimensions of your van?
